



Introduction
Do you want to lock down your internet traffic while traveling or securely access your SOHO (Small Office/Home Office) network without relying on third-party VPN services? Good news — setting up your own WireGuard VPN server is easier than you might expect, especially with the help of an installation script.
For this guide, I’m choosing WireGuard because it’s fast, lightweight, and secure. By default, it uses UDP, which makes connections quick and harder for network filters to detect — especially if you adjust the port number. WireGuard also keeps things clean with minimal overhead, offering a reliable VPN experience without unnecessary complexity. If you need a mesh connection, managing routes is simple and far less of a hassle compared to older solutions like OpenVPN or IPSec.
There are a few ways to get WireGuard up and running. You could follow the official documentation and handle everything manually, or use one of the helpful install scripts available online. Personally, I prefer the PiVPN installation script. It’s fast, dependable, and automates most of the setup process, making your secure VPN setup a quick and easy.
Prerequisites
Before we dive in, make sure you’ve got the basics ready:
- ✅A supported Linux operating system — This guide works well with Debian or Ubuntu. Be sure to assign your server a static local IP address.
- ✅ A public-facing IP address or a dynamic DNS service/domain name — Services like DuckDNS work great. Avoid using a CGNAT (Carrier-Grade NAT) environment, as it limits direct inbound connections.
- ✅ SSH access to your server — You’ll need this for remote configuration and management.
- ✅ Port forwarding enabled for UDP port 51820 (or your preferred custom port) on your router or firewall appliance.
- ✅ Basic Linux command line knowledge — Familiarity with terminal commands will make the process smoother.
- ✅ A properly configured firewall — Always recommended for any internet-facing Linux host to enhance security and reduce exposure.
Install WireGuard with PiVPN Installer
To begin your WireGuard VPN server setup, update your system with the latest packages. If a Linux kernel or critical system component updates, make sure to reboot before moving on. In this example, we're using Debian:
sudo apt update && sudo apt upgrade -yRun the PiVPN Installation Script
Next, download and run the PiVPN install script:
curl -L https://install.pivpn.io | bash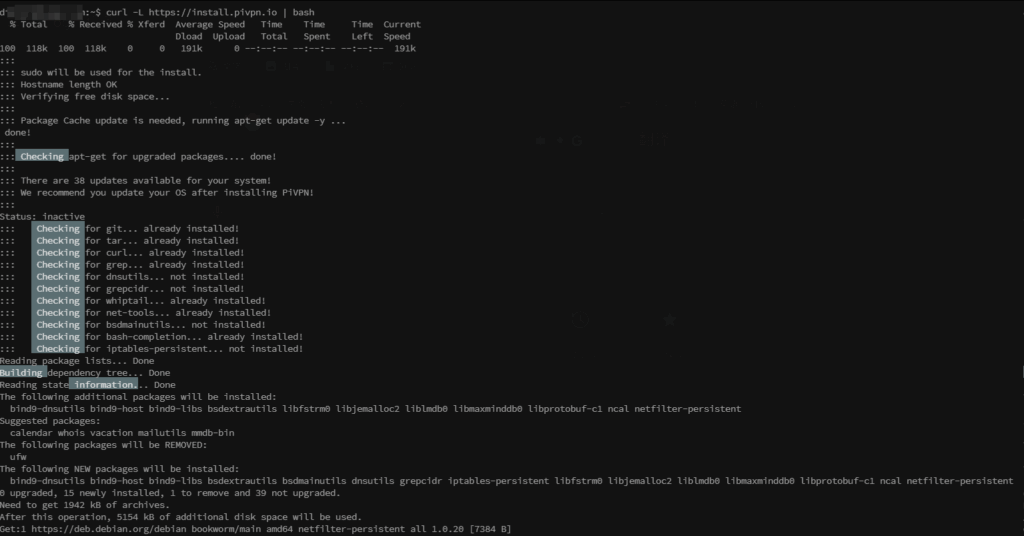
Follow the on-screen instructions using the Tab, Arrow keys, Space, and Enter to navigate through the installer:
Configure the VPN Server Settings
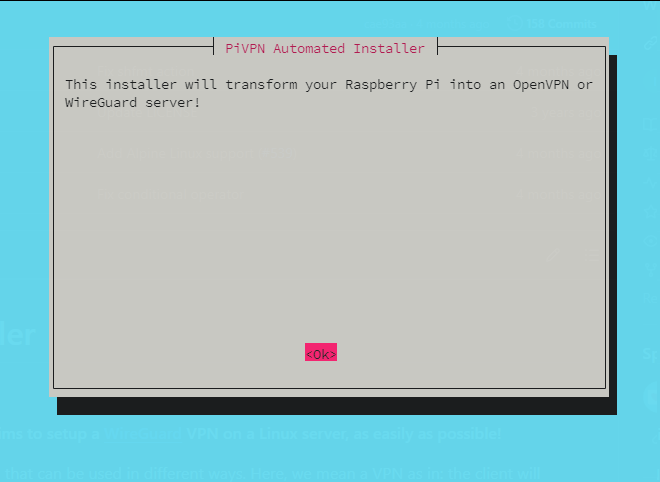
Press Enter to get started:
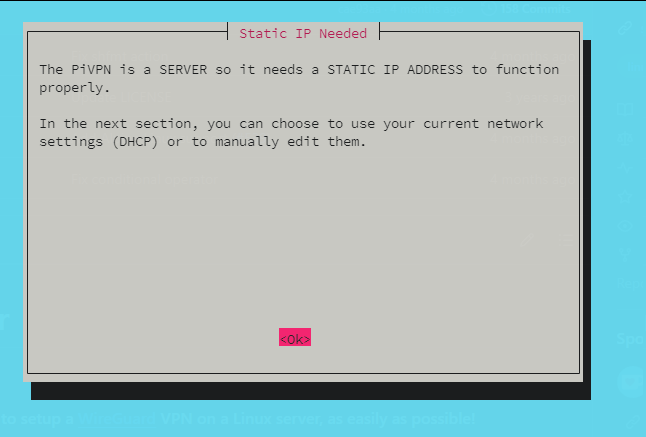
When Static IP Needed prompted, select Enter to continue:
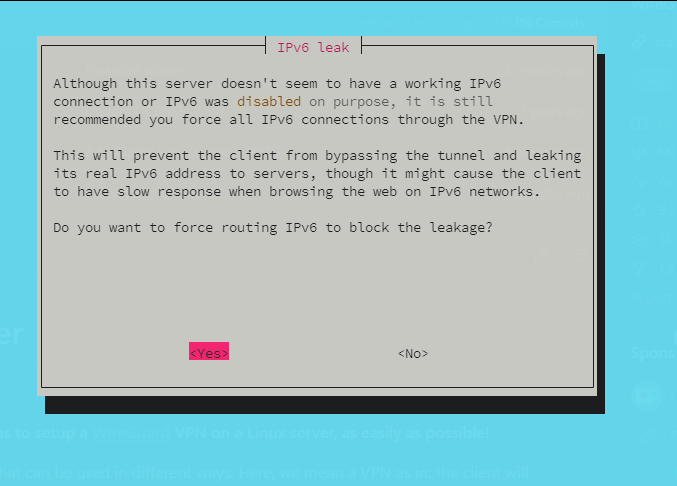
For the IPv6 leak, Select "Yes" is recommended:
In the IP Information step, it inform us need to set a start IP address at host level; Press enter again to continue:

You’ll see a message indicating the configuration files will be stored in the selected user's home directory. Press Enter to proceed.:

Select the Installation User and VPN Type
Choose the appropriate user account. Typically, the current logged-in user works fine. Use Space to select, Tab to move, and Enter to confirm:

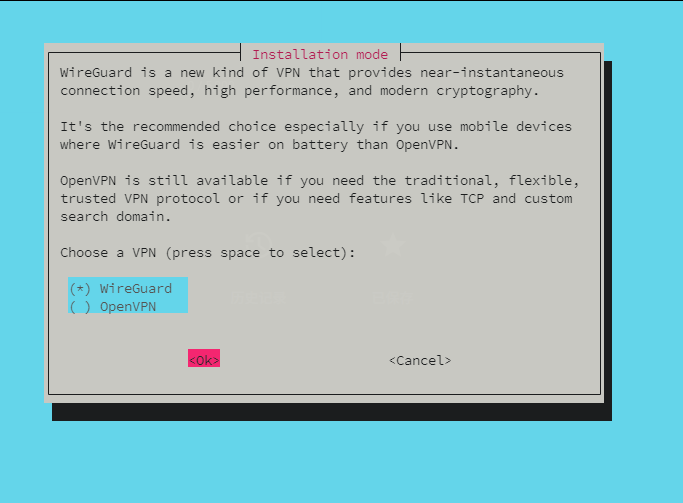
Ensure WireGuard is selected as your VPN type and OK to continue:
Choose a Custom UDP Port
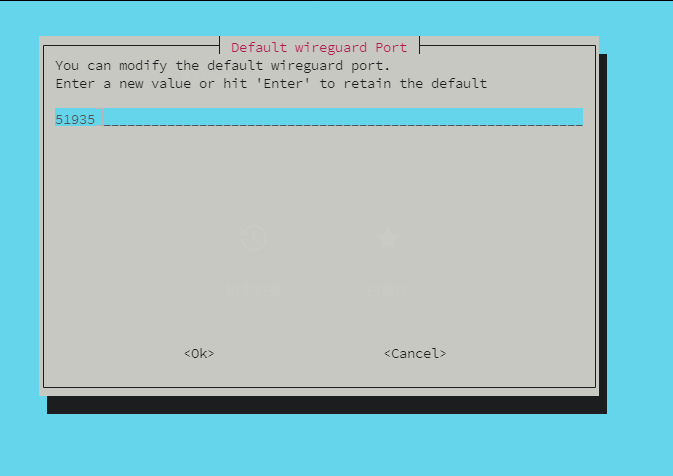
By default, PiVPN uses UDP port 51820. For better security, consider changing this to something like 51935 or another random port number. Select OK to confirm:
Press Enter to confirm the changes:

Select a DNS Provider
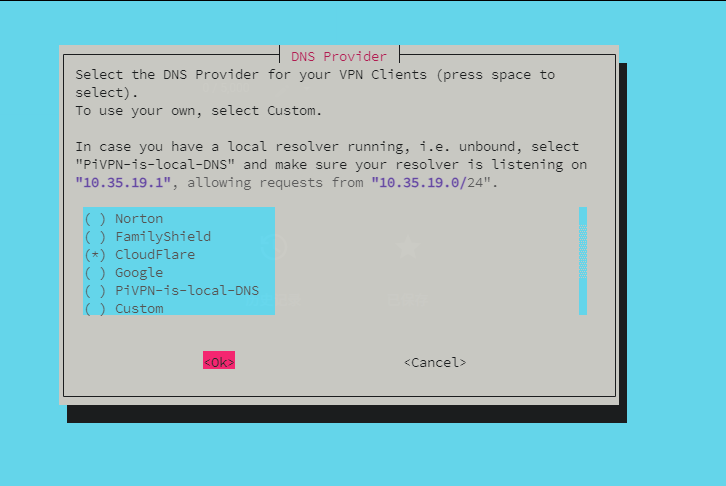
Pick a DNS provider for your VPN clients. You can choose from external services or your internal DNS. In this example, Cloudflare was selected:
Set Your Public IP or DNS Name
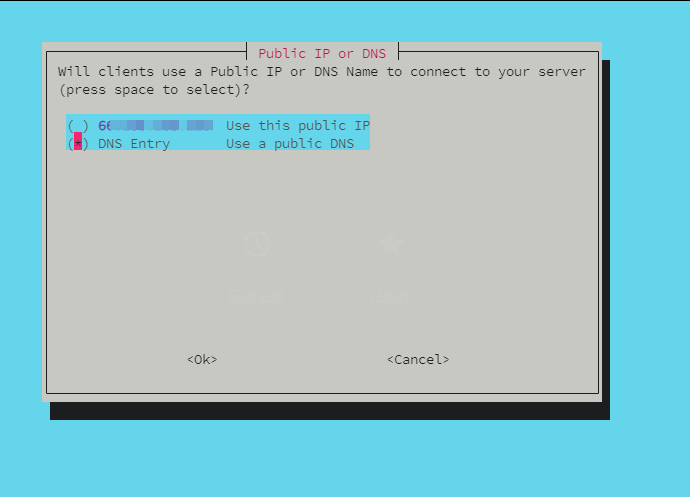
If you have a static public IP, select it.
If you're using a dynamic DNS service (DDNS) or domain name mapped to your IP, select that option instead.
Tip: Even if you select the public IP option now, you can edit it later when creating new peer profiles.
Enter the public DNS name if applicable and confirm the domain:
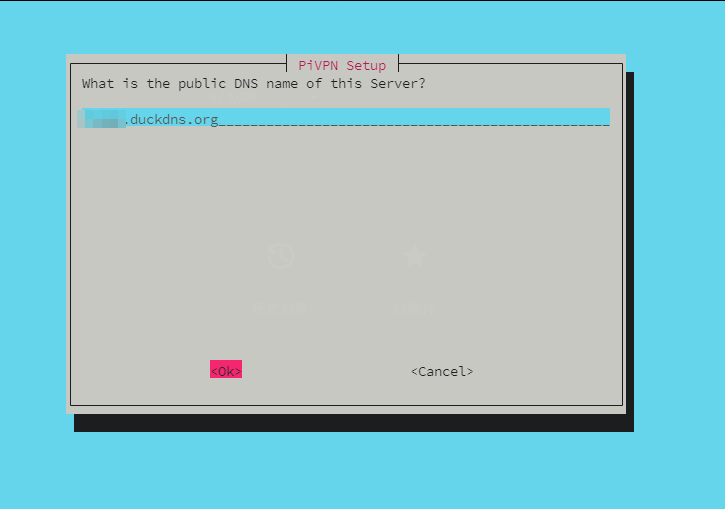
Confirm that is the correct public DNS domain you just enter:

Generate the Server Key Pair
Proceed to generate the WireGuard server’s key pair by pressing Enter:

Configure Unattended Updates
Decide whether to enable the unattended-upgrades service.
If other services run on the same system, you might prefer to disable auto-updates and handle updates manually during scheduled maintenance.
Turn this on if you don’t regularly manage or update your server.
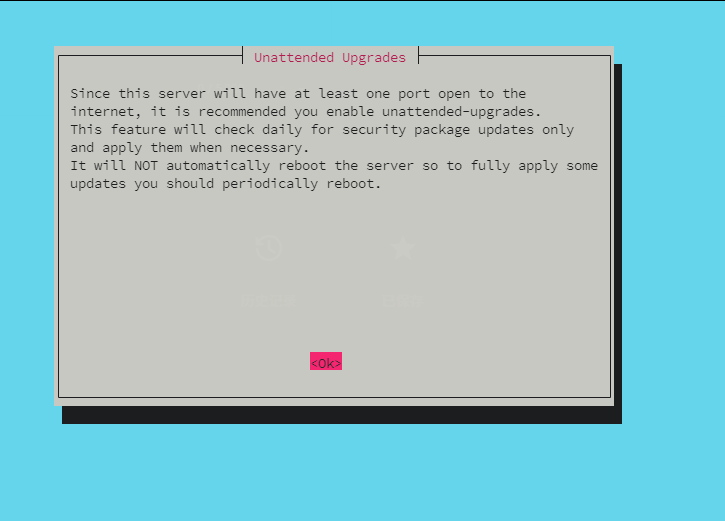
Select the option to enable or disable the unattended-update.
Complete the Installation
Finish the installation process by pressing Enter:

Recommendation: Reboot the server after installation. It’s a good practice, so I may be preventing any issue later down the road:


Configure Your Firewall Or Router
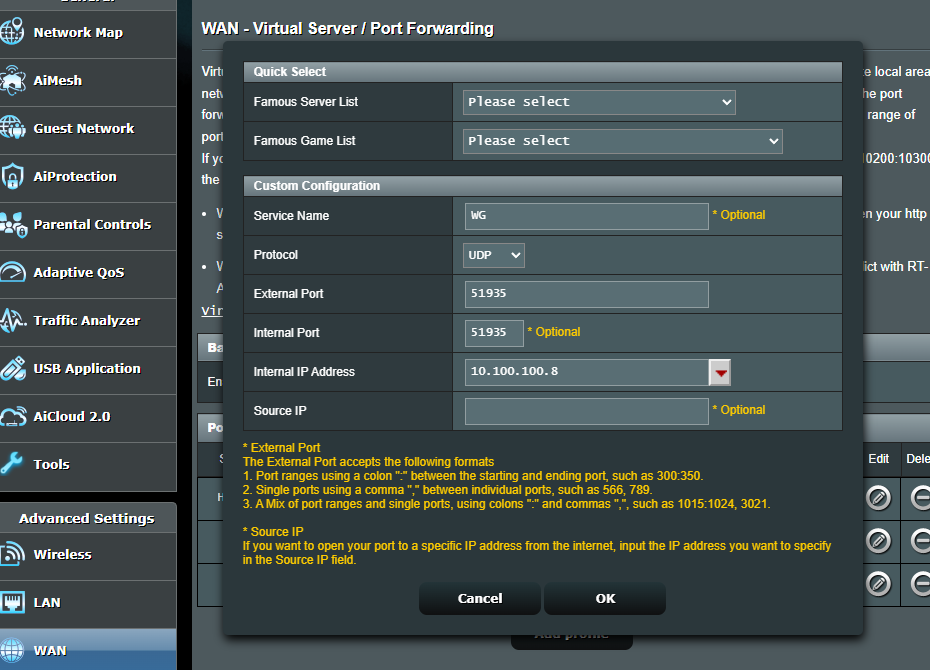
Forward UDP port 51935 (My custom port) to your VPN server’s IP, this step may depend on the kind of network appliances or devices you have in your network, such my internal WireGuard IP is 10.100.100.8, so the following is a ASUS router setting example:
Create VPN Client or Peers Profiles
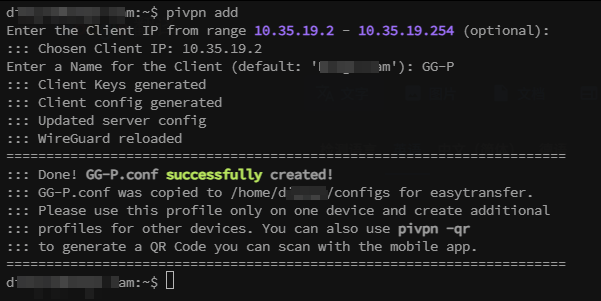
The next step will be adding a new peer to the configuration file, using the pivpn add and will ask for a custom IP (Optional ) and a profile name, and then it will automatic generally peer keys for us:
Windows and Smart Phone Peer Connection:
Copy the .conf file that is under /home/YOURUSERNAME/configs to the client PC to get connected; OR use the pivpn -qr command for WireGuard moblie APP:

Linux Peer Connection:
Install WireGuard package:
To connect a Linux client (peer) to your WireGuard VPN, you’ll first need to install the WireGuard package on the client device. Installation steps vary by distribution, so follow the appropriate instructions for your system. Such as Debian/Ubuntu:
sudo apt-get install wireguard
Set Up the WireGuard Directory:
As the root user (or using sudo), create the configuration directory if it doesn’t exist already, and set strict permissions to secure it:
sudo mkdir -p /etc/wireguard
sudo chown root:root /etc/wireguard
sudo chmod 700 /etc/wireguard
This ensures that only the root user can access the WireGuard configuration files, protecting private keys and sensitive settings.
Move and Customize the Configuration
Once your WireGuard peer configuration file is generated (likely from your PiVPN server or another setup), move it to /etc/wireguard/. Replace whatever.conf with your actual config file name (e.g., wg0.conf or vpn-home.conf)
At this point, you can optionally edit the configuration to customize settings like AllowedIPs, DNS, or endpoint addresses to suit your specific connection requirements:
sudo nano /etc/wireguard/whatever.confActivate and Deactivate the Tunnel
To bring up the VPN connection:
sudo wg-quick up whateverAnd to bring it down when you're done:
sudo wg-quick down whateverHow to fix it:
Option 1: Install resolvconf, such as sudo apt-get install resolvconf
Option 2: If you don’t need to push DNS changes when the tunnel comes up (say, you're fine using your existing resolver): Remove the DNS line from your config, such as #DNS = 1.1.1.1 ← comment or remove this line
Connect and test your secure VPN tunnel!🎉
Additional Configuration and Troubleshooting
Additional Configuration
For all the command & functionality simply input: pivpn -h
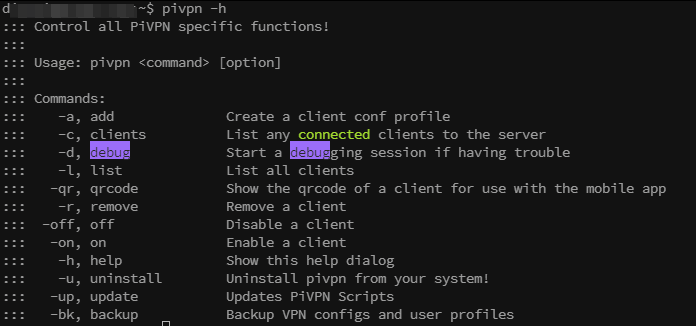
If you decide to change the PiVPN default configuration, such as edit DNS, enable IPv6, etc., please edit with the following file:
sudo nano /etc/pivpn/wireguard/setupVars.confSome useful commands that are useful for establishing and checking the status of WireGuard servers:
#bring the WireGuard interface up, "whatever" likely the 'wg0.conf' file, use 'sudo ls /etc/wireguard/'command to check the config files:
wg-quick up whatever

#After running this up, use the 'ip address' command to check the interface, default should be 'wg0':
wg-quick up whatever

#Check the systemd server, wg0 is the default:
sudo systemctl status wg-quick@wg0

#Restart the service:
sudo systemctl restart wg-quick@wg0
For all the configuration and options, please refer to the official PiVPN documentation site: https://docs.pivpn.io/wireguard/
Troubleshooting
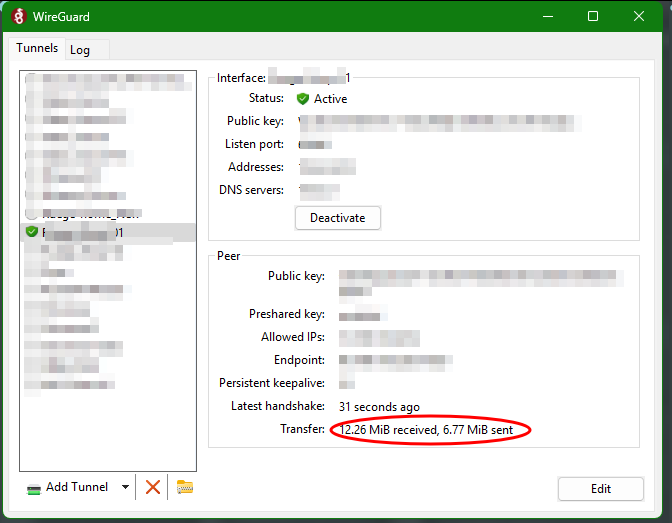
How do I know my WireGuard is working or not for my first connection? For the desktop or mobile, if you got a received data increase is meant communicating; In addition, check on the log tab also gives you some great insight on the connection status.
I replaced a network card, WireGuard no longer work? Edit the /etc/pivpn/wireguard/setupVars.conf file when you main network interface is changed.
for PiVPN diagnostic, run command pivpn -d would be very helpful.
Optional - Allow All Traffic Route Through WireGuard VPN
Full tunnel vs. split tunnel:
By default, PiVPN with WireGuard routes all traffic through the VPN tunnel. You’ll notice this in the client (peer) configuration with the following line:
AllowedIPs = 0.0.0.0/0, ::/0
This is known as a full tunnel setup — meaning all internet and LAN traffic is routed through your VPN server.
If you prefer a split tunnel setup, where only specific networks (like your home LAN or certain private subnets) are routed through the VPN while other traffic uses the local connection, you can adjust the AllowedIPs line like this:
AllowedIPs = 10.35.19.0/24, 10.0.100.0/24, fd9a:1ba7:bac3::/48
10.35.19.0/24— WireGuard VPN subnet10.0.100.0/24,fd9a:1ba7:bac3::/48— your internal LAN subnets
To help with subnet calculations for your setup, tools like the WireGuard Allowed IPs & Disallowed IPs calculator from procustodibus.com can be very useful.
Enable IP forwarding & Enable NAT On the Server:
For a full tunnel configuration (or split tunnel accessing other networks), you’ll need to enable IP forwarding and configure NAT (Network Address Translation) on your WireGuard server. Here’s how:
Enable IP Forwarding:
On your server, edit the sysctl configuration:
sudo nano /etc/sysctl.d/99-sysctl.confUncomment or add these lines:
net.ipv4.ip_forward = 1
net.ipv6.conf.all.forwarding = 1
Then apply the changes:
sudo sysctl -pYou should see confirmation similar to:
net.ipv4.ip_forward = 1
net.ipv6.conf.all.forwarding = 1
Enable NAT on the Server:
Depending on your distribution and preference, you can use either nftables (modern distros) or iptables (legacy systems) to handle NAT.
Using nftables (recommended on most modern systems)
Edit your /etc/wireguard/wg0.conf and add these lines to the [Interface] section:
sudo nano /etc/wireguard/wg0.confPostUp = nft add table ip wireguard; nft add chain ip wireguard wireguard_chain { type nat hook postrouting priority srcnat; policy accept; }; nft add rule ip wireguard wireguard_chain counter packets 0 bytes 0 masquerade; nft add table ip6 wireguard; nft add chain ip6 wireguard wireguard_chain { type nat hook postrouting priority srcnat; policy accept; }; nft add rule ip6 wireguard wireguard_chain counter packets 0 bytes 0 masquerade
PostDown = nft delete table ip wireguard; nft delete table ip6 wireguard
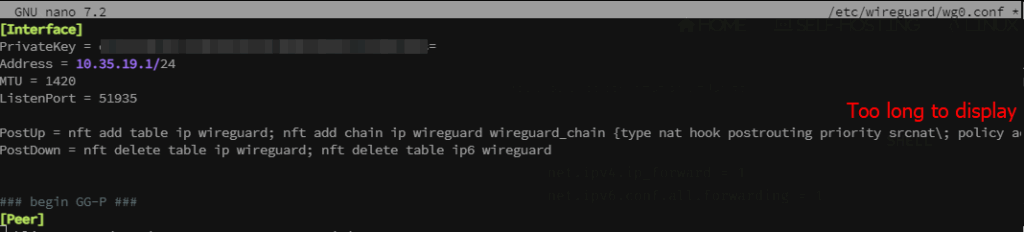
If nftables isn’t installed (should be there by default) :
sudo apt-get install nftablesUsing iptables (for older distributions)
Edit your /etc/wireguard/wg0.conf and in the [Interface] section, add:
sudo nano /etc/wireguard/wg0.confPostUp = iptables -w -t nat -A POSTROUTING -o eth0 -j MASQUERADE; ip6tables -w -t nat -A POSTROUTING -o eth0 -j MASQUERADE
PostDown = iptables -w -t nat -D POSTROUTING -o eth0 -j MASQUERADE; ip6tables -w -t nat -D POSTROUTING -o eth0 -j MASQUERADE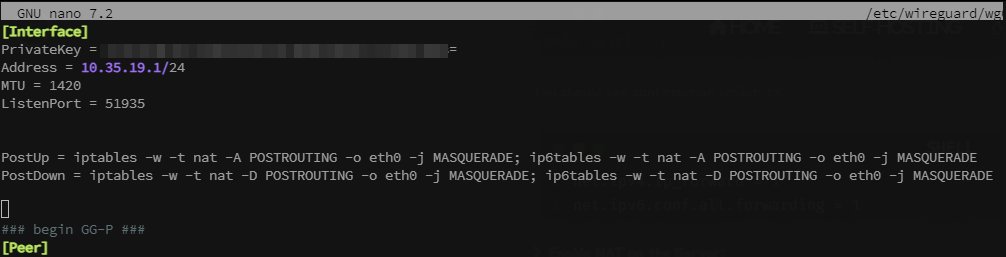
What PostUp and PostDown Do:
These commands run when the WireGuard interface is brought up or down. They handle the masquerading of outbound traffic, letting VPN clients appear as if they're coming from the server’s IP address — essential for routing client traffic to the internet.
Reference
Official WireGuard Site: https://www.wireguard.com/
PiVPN Wireguard Configuration Site: https://docs.pivpn.io/wireguard/
PiVPN Wireguard Github Project: https://github.com/pivpn/pivpn
WireGuard Allow Client Internet Traffic Route Through Server Guide - from procustodibus.com: https://www.procustodibus.com/blog/2022/09/wireguard-port-forward-from-internet/
WireGuard Allowed IPs & Disallowed IPs Calculator site, from procustodibus.com: https://www.procustodibus.com/blog/2021/03/wireguard-allowedips-calculator/
Comments NOTHING