


When working with Linux CLI-only virtual machines, the default noVNC console is often inconvenient for pasting long commands, scripts, Docker Compose files, or cloud-init configurations.
A better option is to use a Serial Console with xterm.js, which provides a terminal-like experience directly in the Proxmox web interface and allows reliable copy-and-paste operations. This is especially useful for cloud images and minimal Linux installations that do not have a graphical environment.
Why Use a Serial Console?
Benefits:
- Copy and paste long commands directly into the VM
- Works without a graphical desktop
- Faster than noVNC for terminal work
- Useful when network connectivity or SSH are broken
- Similar to SSH terminal behavior
- Easier to capture boot messages and troubleshooting output
Configure the VM Hardware
From the Proxmox host, ensure the guest VM is off and then edit:
#!/bin/bash
qm set [VMID] --serial0 socket
Example:
#!/bin/bash
qm set 200 --serial0 socket

#--output:
update VM 200: -serial0 socket
The above commands accomplished the following tasks:
- Adds a virtual serial port (
serial0) - Sets the VM display to use the serial console
- Causes the Proxmox Web Console to use xterm.js instead of the traditional noVNC display.
Configure Linux Guest for Serial Console
Turn on the Linux VM, Edit GRUB:
#!/bin/bash
sudo nano /etc/default/grub
Find:
#!/bin/bash
GRUB_CMDLINE_LINUX_DEFAULT="quiet"
Change to:
#!/bin/bash
GRUB_CMDLINE_LINUX_DEFAULT="quiet console=tty0 console=ttyS0,115200"
Update GRUB:
Debian / Ubuntu
#!/bin/bash
sudo update-grub
RHEL / Rocky / AlmaLinux
#!/bin/bash
sudo grub2-mkconfig -o /boot/grub2/grub.cfg
Reboot:
#!/bin/bash
sudo reboot
This instructs Linux to send console output to both the normal display and the virtual serial port.
Using xterm.js in Proxmox
After the VM reboots:
- Open the VM in Proxmox.
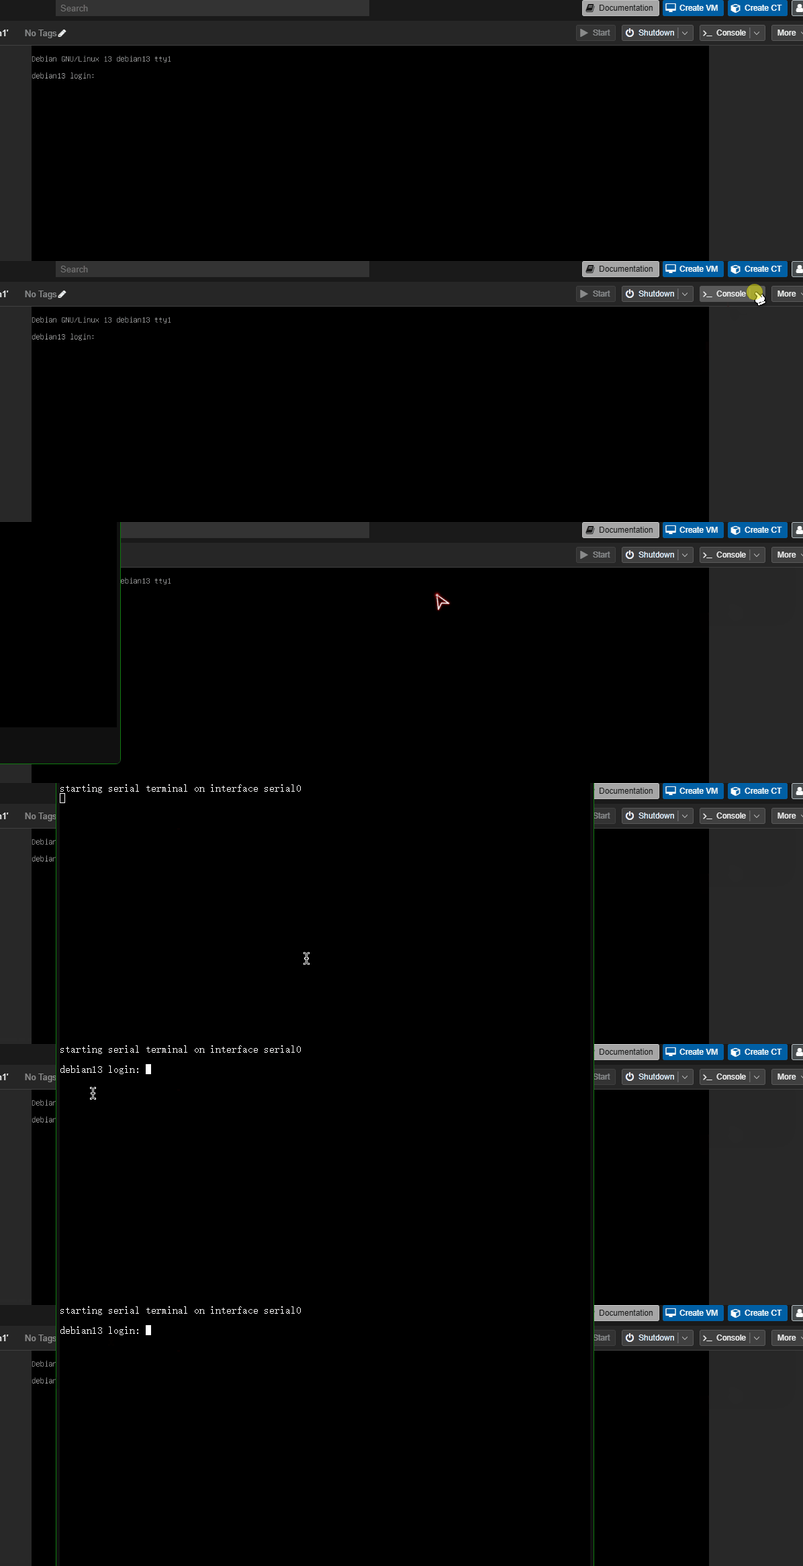
- Click Console on the top-right corner.
- Select xterm.js from the drop down.
You may initially see:
#!/bin/bash
starting serial terminal on interface serial0
Simply press Enter to obtain a login prompt.
Connect from the Proxmox Host CLI
You can access the VM serial console directly from the Proxmox shell or SSH:
#!/bin/bash
qm terminal [VMID]
Example:
#!/bin/bash
qm terminal 100
Output:
#!/bin/bash
starting serial terminal on interface serial0
Press Enter and log in normally.
To disconnect:
#txt
Ctrl + O
If using another serial interface:
#!/bin/bash
qm terminal 100 --iface serial1
Verify Serial Console Configuration
Check the VM configuration:
#!/bin/bash
qm config [VMID]

#Expected output:
serial0: socket
You can also verify the serial device from the Proxmox host:
#!/bin/bash
qm monitor [VMID]
Then:
#!/bin/bash
info chardev
You should see something similar to:
#!/bin/bash
serial0: filename=disconnected:unix:/var/run/qemu-server/[VMID].serial0
Comments NOTHING