



Introduction
So, if you've recently taken the plunge and installed the FreshTomato custom router firmware to replace your OEM (Original equipment manufacturer) firmware, but now you find yourself unsure about how to set up an OpenVPN server, don't worry! In this comprehensive guide, I'll walk you through the step-by-step process to get your OpenVPN server up and running smoothly.
Requirements
Before we dive into the configuration process, let's gather the tools needed for our setup:
- FreshTomato Router
- OpenVPN Client Software: OpenVPN Connect or OpenVPN Community Edition
- Dynamic DNS already set up in your FreshTomato: such as DuckDNS (not required if you got a static public address)
- Compression tool for unzipping files in your working PC
- A simple text editor on your PC
Configurer FeshTomato Router
Open the FreshTomato web interface and navigate to the VPN tunnel and tab and then click on OpenVPN Server ▶ Server 1:
To begin, select the Basic tab. Check 'Enable on Start' if you want the server to start automatically when the router boots. Besides changing the port number to a different one other than the default for security reasons (such as 4486), most of the choices here can be the default. And then push the 'save' button on the bottom.

The next step is to click on the advanced tab and select the LAN Network interface that you want to be pushed. Check 'Direct clients to redirect Internet traffic' if you want all of your traffic to go through your network when you're not at home. Next, check 'Respond to DNS' and 'Advertise DNS to clients' so that when you connect over VPN, you will use the FreshTomato router DNS setting.
Enable User/Pass Auth to add an extra layer of protection, so a user will need both a valid certificate and a user/password combo to get into your network. Set one up for each of your users by clicking enable, typing a username, and a password, and then clicking add, then pushing the 'save' button on the bottom.

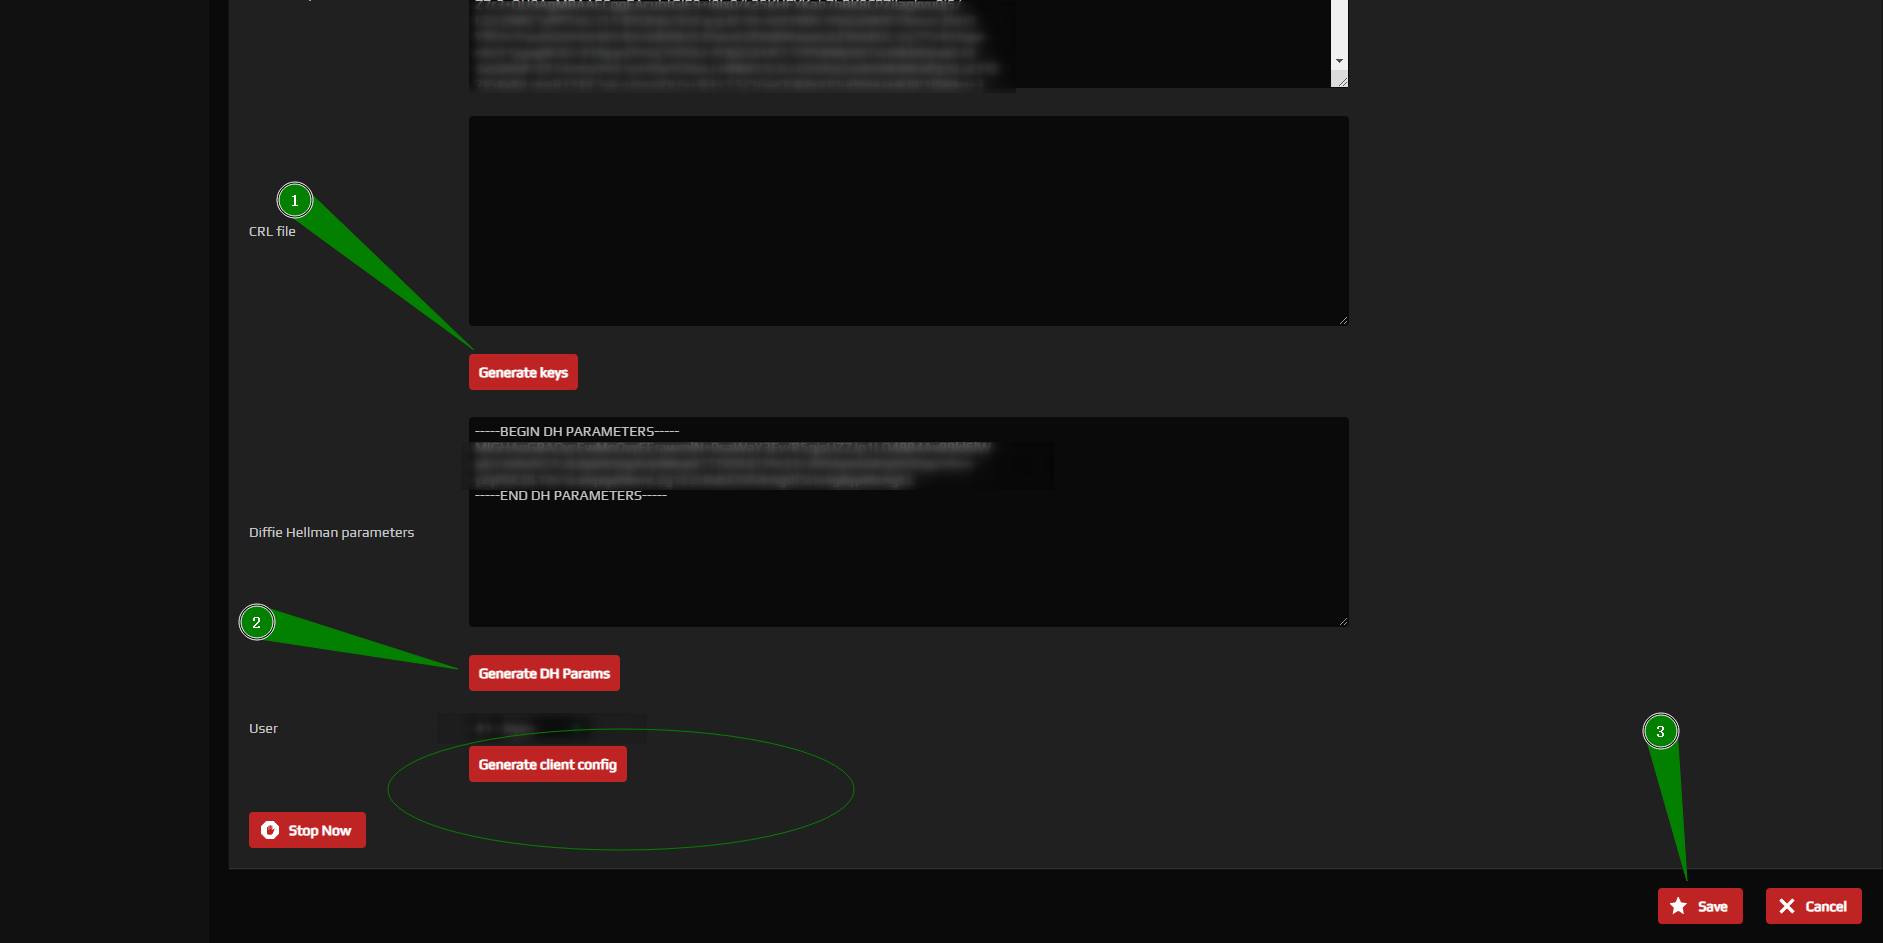
Finally, we go to the Keys section to generate some keys. To complete this step, simply hit 'Generate keys', wait for it to finish, then tap 'Generate DH Params', wait for it to finish (hint: please be patient it can take a while), then click save on the bottom again. After have saved it, click "Generate client config," which will download a .tgz format file called "ClientConfig".
Note: if you added multiple users to connect or multiple users simultaneously connect to the router, you will have to select the user profile and push the 'Generate client config' button on this page.
Connect with the Client
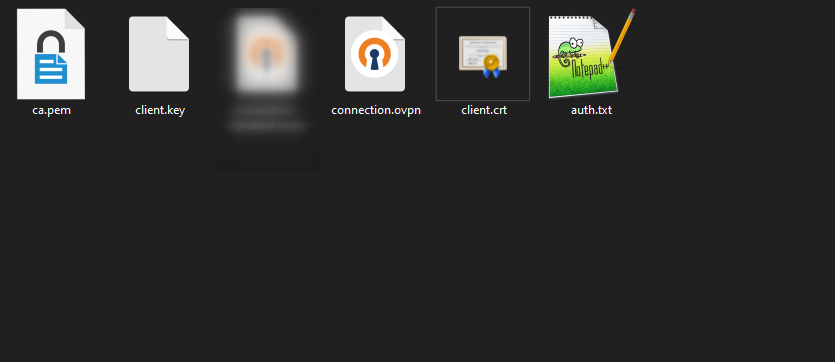
After you download 'ClientConfig.tgz' file from the last steps, you can use the compression to unzip it, and you will get the following file:
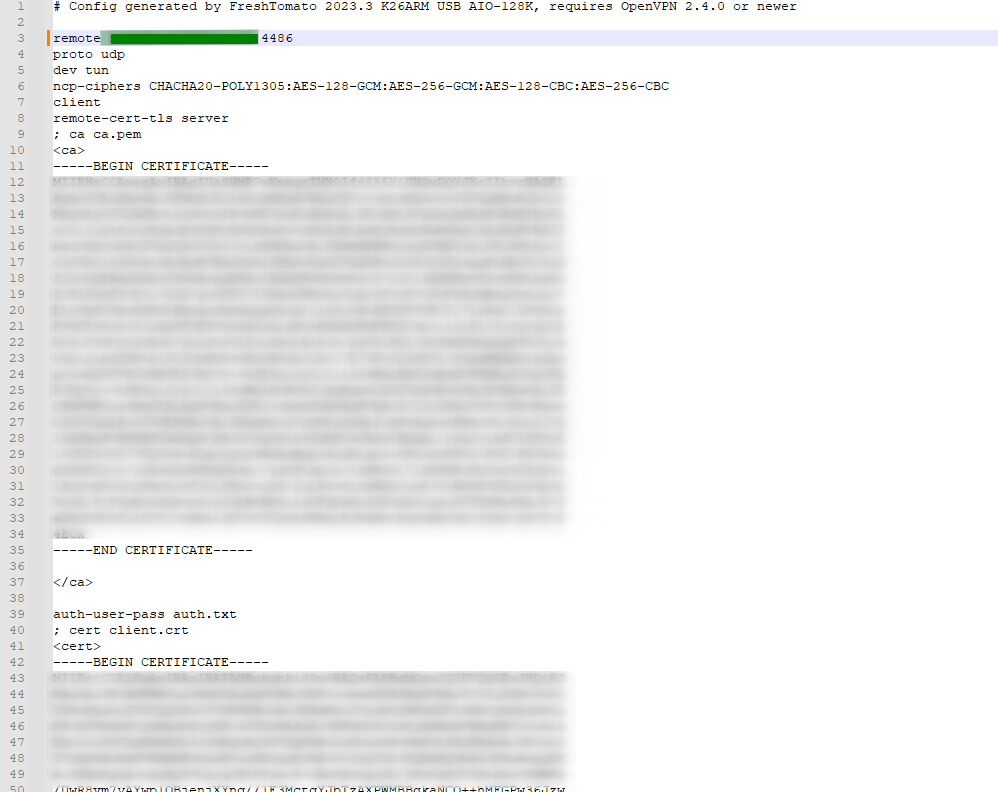
Before we import it to the client software we need to edit the OpenVPN configuration file (.ovpn) by using a text editor, the configuration includes your public IP address at that time, a generation you may want to change to DDNS, look for a line that begins with the word "remote", and then modify the IP address with your DDNS address, and make sure to save the updated OpenVPN configuration file:
For OpenVPN Community Edition clients, now take all the downloaded files and the .ovpn file you just modify and then put it in the OpenVPN client configuration directory (such as C:\Users\[username]\OpenVPN\config\connection), and then you should be able to connect.
As for OpenVPN Connect clients, it allows only .ovpn file format to import, so it doesn't work for the configuration file here (it will get 'UNKNOWN/UNSUPPORTED OPTIONS' error), because it loads the username and password from other than connection.ovpn files. To make it work, you want to modify the configuration file again to match the OpenVPN connect client requirement:
client
remote ddns.example.com 4499
proto udp
dev tun

keepalive 15 60
auth-user-pass
remote-cert-tls server
<ca>
-----BEGIN CERTIFICATE-----
........omitted........
-----END CERTIFICATE-----

</ca>
<cert>
-----BEGIN CERTIFICATE-----
........omitted........
-----END CERTIFICATE-----

</cert>
<key>
-----BEGIN PRIVATE KEY-----
........omitted........
-----END PRIVATE KEY-----

</key>
After the finish then editing .ovpn files and importing them into the OpenVPN connect client, you will need to enter your username and password, and then you will be able to successfully.
Reference
FreshTomato Wiki: OpenVPN Server
Comments NOTHING